






The Craft Cabin

October Offer: Free Shipping Over €35

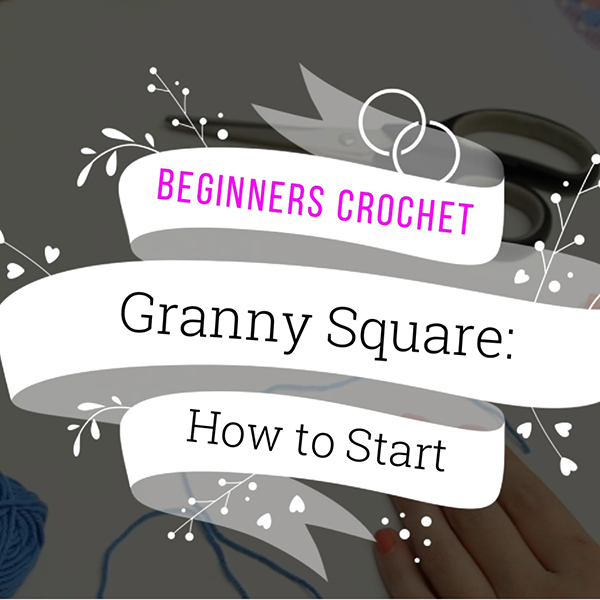
How To Start A Granny Square

Granny squares are one of the best places to start with crochet. They’re simple, satisfying, and once you know the first round, you can use them for blankets, bags, bunting, cushions and all sorts.

If you’re new to crochet, don’t worry if it feels a little fiddly at first. The beginning is always the awkward bit, mostly because yarn likes to test your patience before becoming useful.

In this tutorial, we’re making the first round of a traditional granny square.

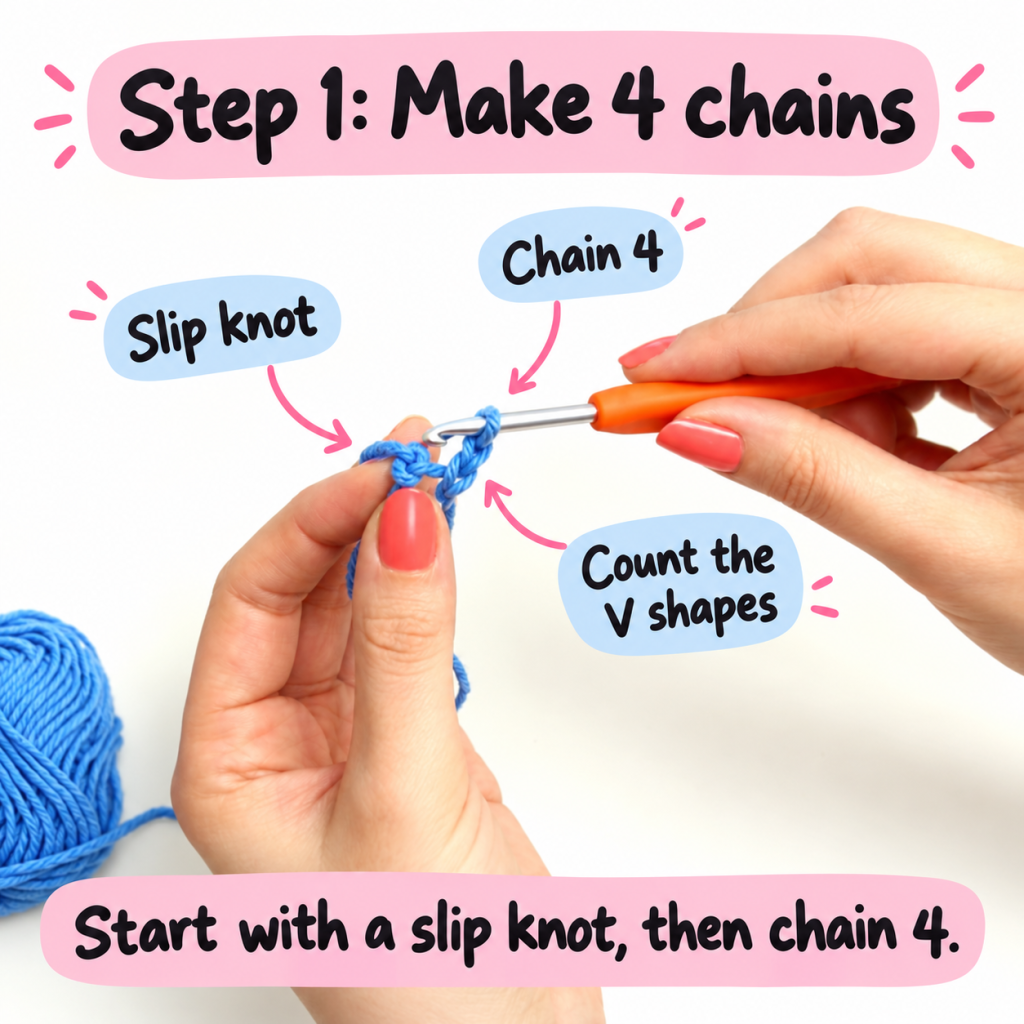
Step 1, Make 4 chains

Start with a slip knot on your hook, then make 4 chains.

You can count your chains by looking for the little V shapes.

What you should have:
A slip knot plus 4 chains.

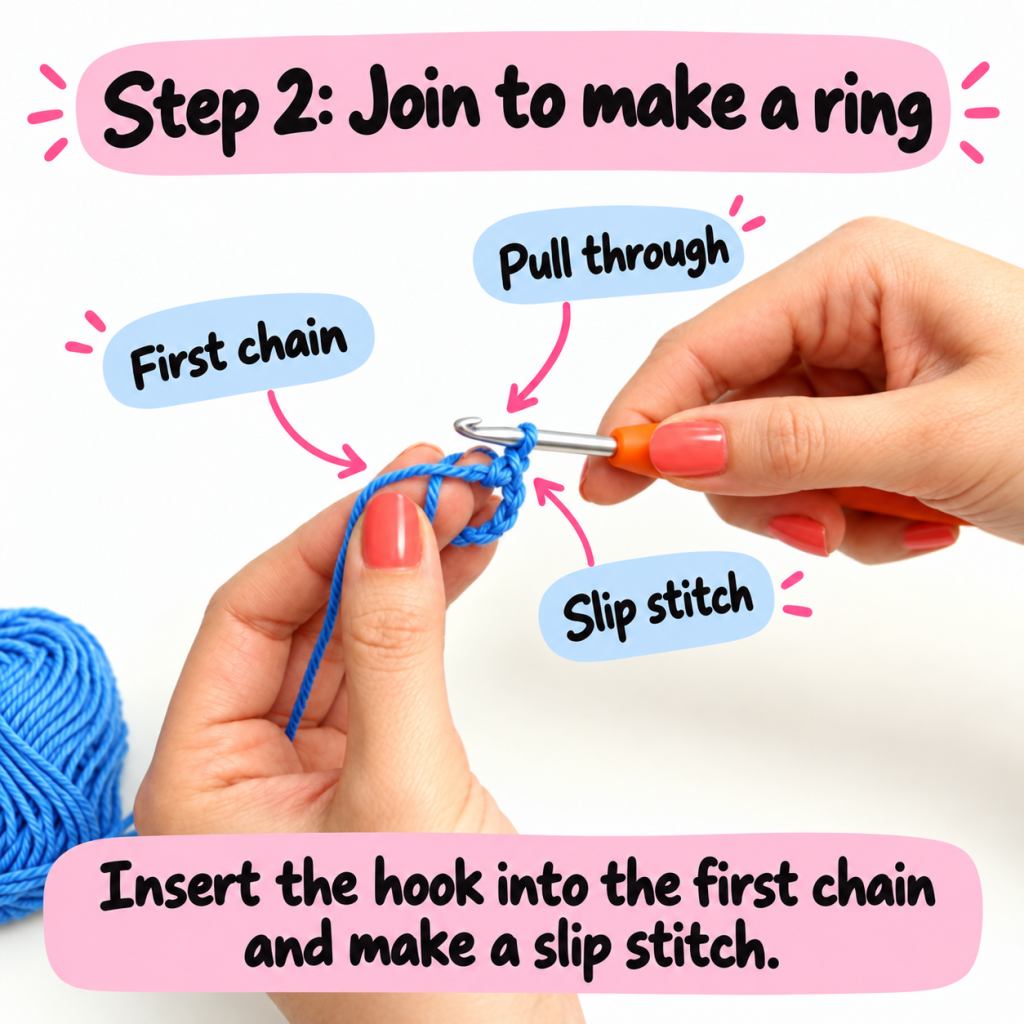
Step 2, Join to make a ring

Insert your hook into the first chain you made, then pull the yarn through and complete a slip stitch.

This joins the chains into a small ring.

What you should have:
A small loop or ring that you’ll crochet into.

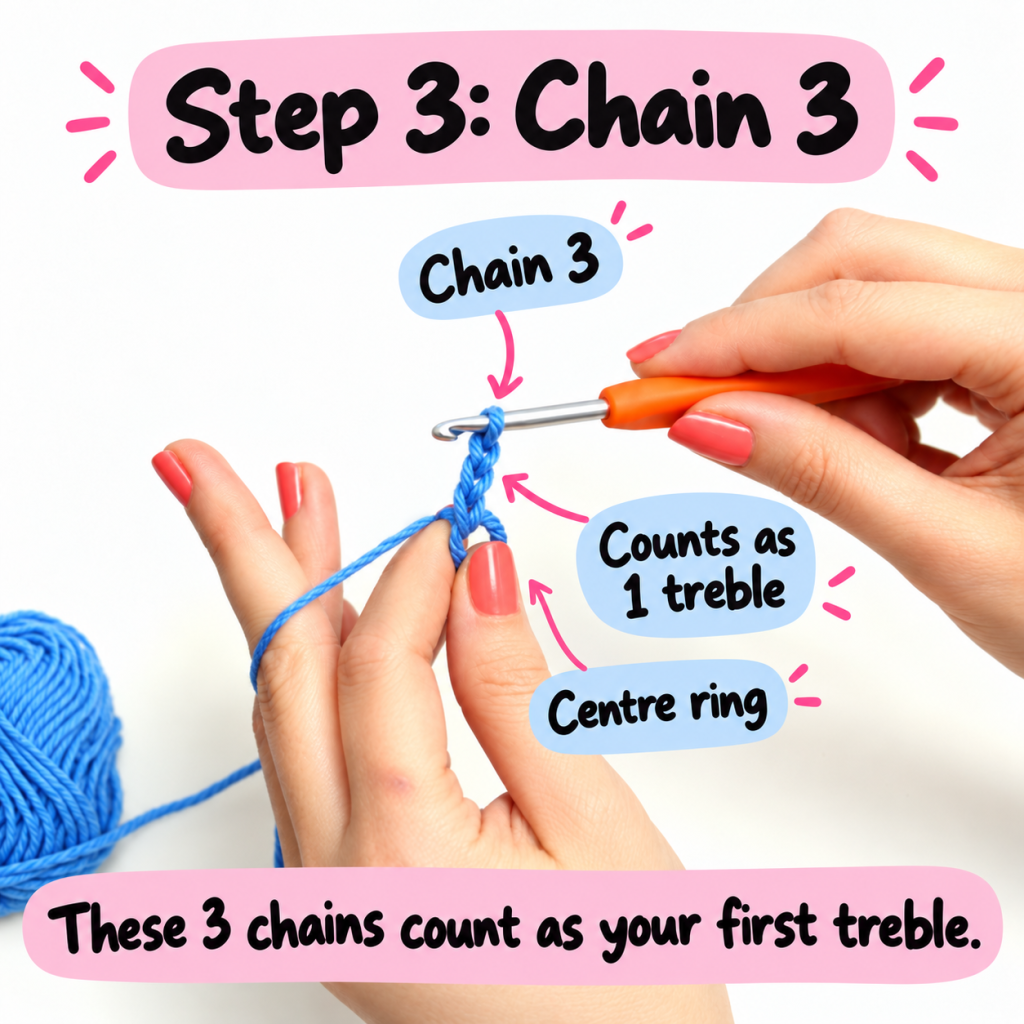
Step 3, Chain 3

Now make 3 chains.

These 3 chains count as your first treble crochet.

That means they are standing in for one stitch in your first group.

What you should have:
A ring with a chain-3 coming up from it.

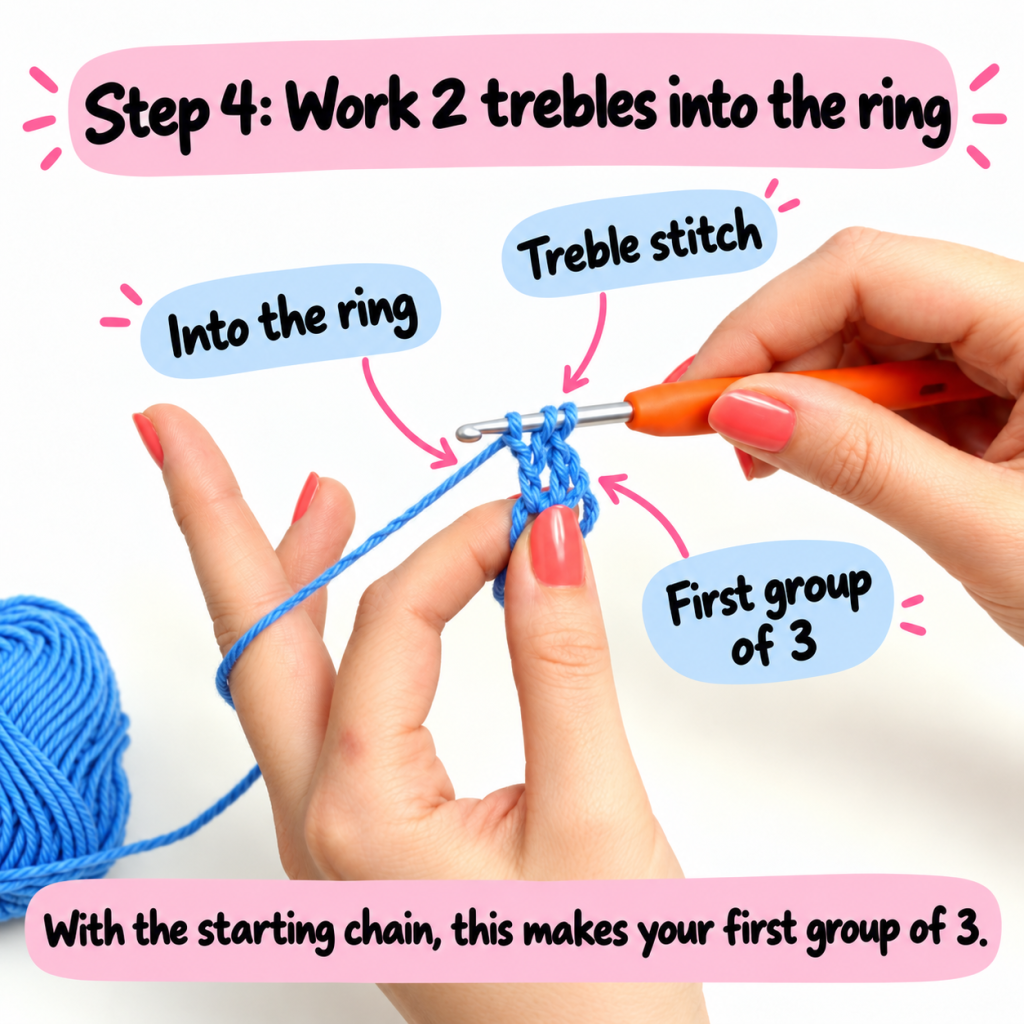
Step 4, Work 2 trebles into the ring

Next, work 2 treble crochets into the centre of the ring.

Together with your starting chain 3, this gives you your first group of 3 stitches.

What you should have:
One full granny-square cluster, made up of:

  • chain 3, which counts as 1 treble
  • 2 trebles

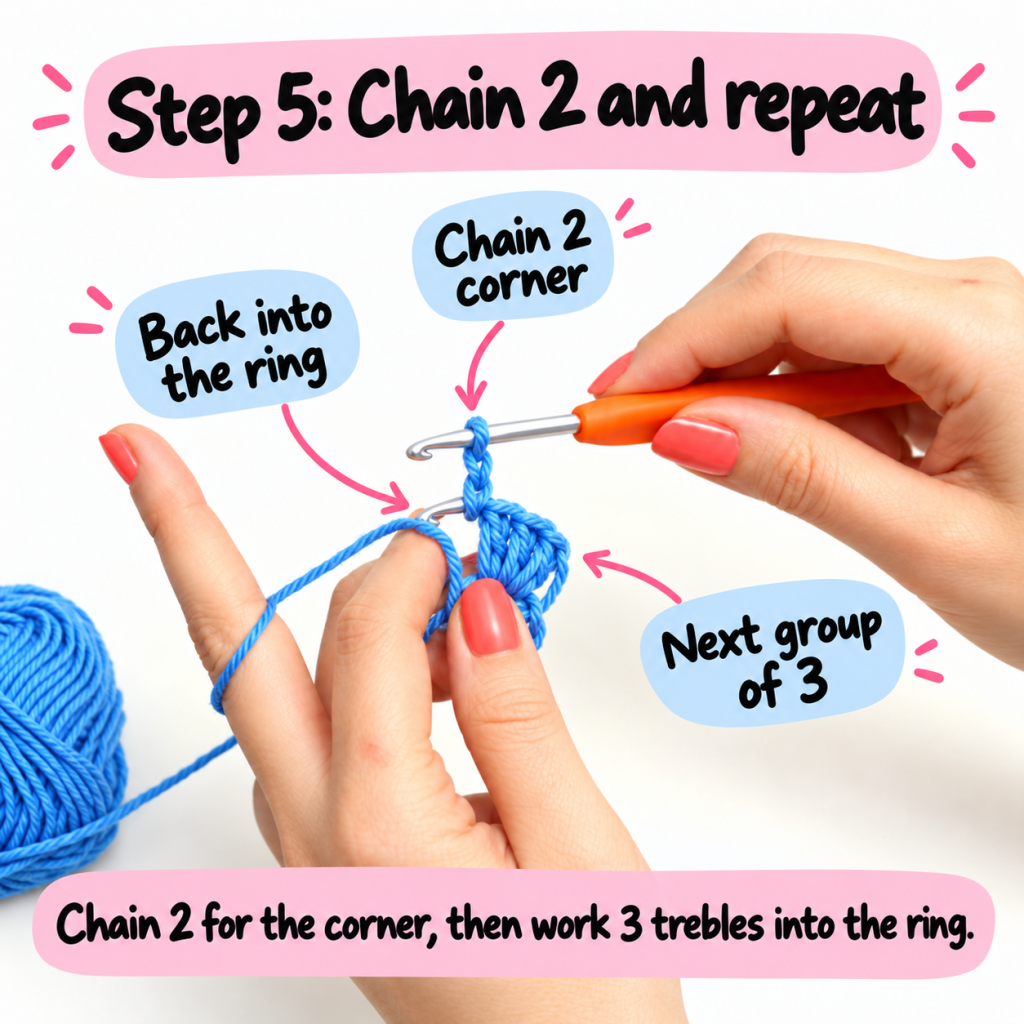
Step 5, Chain 2 and repeat

To make the first corner, chain 2.

Then work 3 trebles into the ring.

Repeat this again:

  • chain 2
  • 3 trebles into the ring

And once more:

  • chain 2
  • 3 trebles into the ring

You are building the first round by making groups of 3 trebles, separated by chain-2 corner spaces.

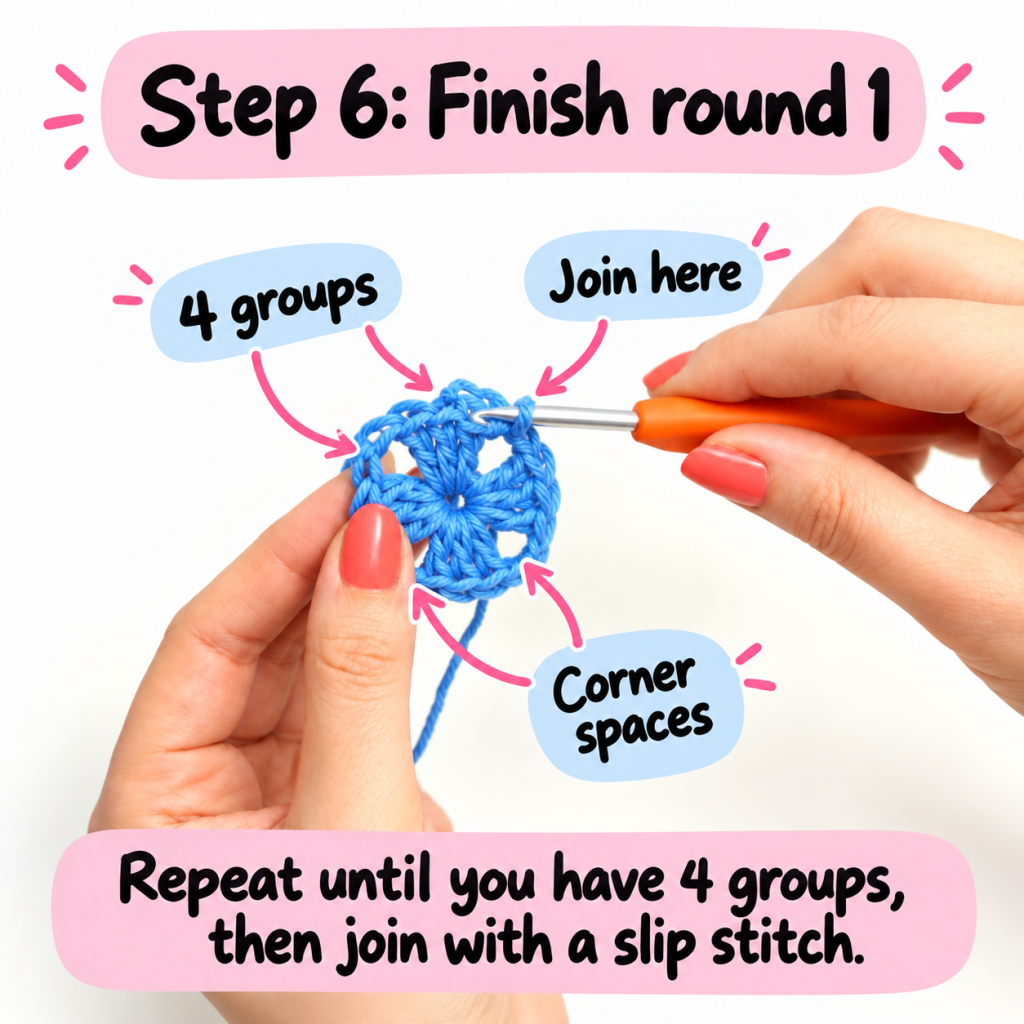
Step 6, Finish round 1

Once you have 4 groups of 3 stitches, join the round with a slip stitch.

You should join into the top of the starting chain 3.

Your finished first round should have:

  • 4 groups of 3 stitches
  • 4 corner spaces
  • a small square shape beginning to form

You’ve started your granny square

That’s the first round done.

Once you can do this part, the rest of the granny square becomes much easier. You’re simply building on those groups and corner spaces in the next rounds.

If yours looks a bit wonky, that’s completely normal. Crochet usually looks slightly suspicious until it suddenly doesn’t.


Quick recap

To start a granny square:

  1. Make a slip knot
  2. Chain 4
  3. Join with a slip stitch to form a ring
  4. Chain 3, this counts as your first treble
  5. Work 2 trebles into the ring
  6. Chain 2
  7. Work 3 trebles into the ring
  8. Repeat until you have 4 groups of 3
  9. Join with a slip stitch to finish the round

Beginner tip

If you lose track, look for:

  • 4 clusters, each with 3 stitches
  • 4 chain spaces for the corners

That’s the easiest way to check whether your first round is correct.


Next step

Once you’ve finished round 1, you’re ready to continue your granny square by working into the corner spaces and building the next round.

If the Video Is not showing Disable Your Cookie Blocker

Shop The Products

Scroll to Top

Get 10% Off Your First Order

Join our mailing list for all the latest news, tips and deals

We use MailChimp as our marketing automation platform. By clicking above to submit this form, you acknowledge that the information you provide will be transferred to MailChimp for processing in accordance with their Privacy Policy & Terms & Conditions. 

The Craft Cabin
Privacy Overview

This website uses cookies so that we can provide you with the best user experience possible. Cookie information is stored in your browser and performs functions such as recognising you when you return to our website and helping our team to understand which sections of the website you find most interesting and useful.